A fabric swatch shows color and pattern, but not how the material may read as a finished garment. Fabric generation creates visual directions you can review before moving to physical sampling.
Fabric Shot Generation takes a single fabric image and creates garment visualizations using that fabric. Before any physical sample is made, you can preview how the fabric reads in real garments.
Use it to review fabric proposals before ordering, or to quickly visualize one fabric across multiple garment types.
Who’s this for? 👀
- Anyone reviewing fabric proposals before bulk ordering
- Designers wanting to visualize a single fabric across multiple garment types quickly
- Teams looking to reduce sample costs and turnaround time while speeding up design reviews
What you’ll need 🧰
Before generating, get these images ready.
| Item | Required | Description |
|---|---|---|
| Fabric image | Required | A fabric or swatch image to apply to garments. Make sure the pattern, color, and texture are clearly visible. |
| Reference garment image | Optional | A reference image if you have a specific garment shape in mind. Skip this and use LaonGEN’s recommended designs. |
✋ Just one thing! Only the fabric image is required. Garment shapes can use the recommended designs, so a single fabric image is enough to start.
Fabric Shots, step by step
STEP 1. Set fabric info 🧵
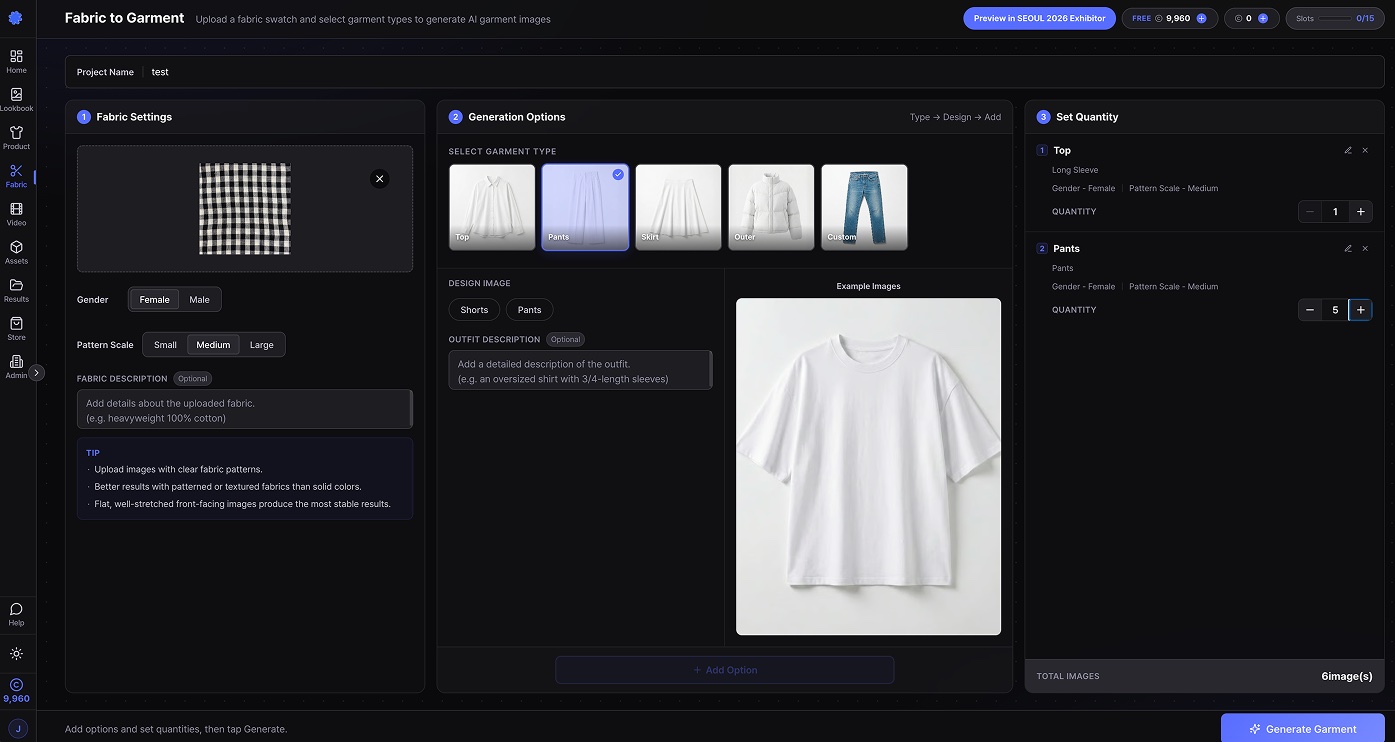
In the left area, upload your fabric image and basic info.
Upload the fabric image or drag and drop. The fabric becomes the base image applied to your generated garment.
Then set the following:
- Gender — Female / Male
- Fabric scale — Small / Standard / Large
- Fabric description — Optional
Fabric scale controls how large the pattern appears when applied to the garment.
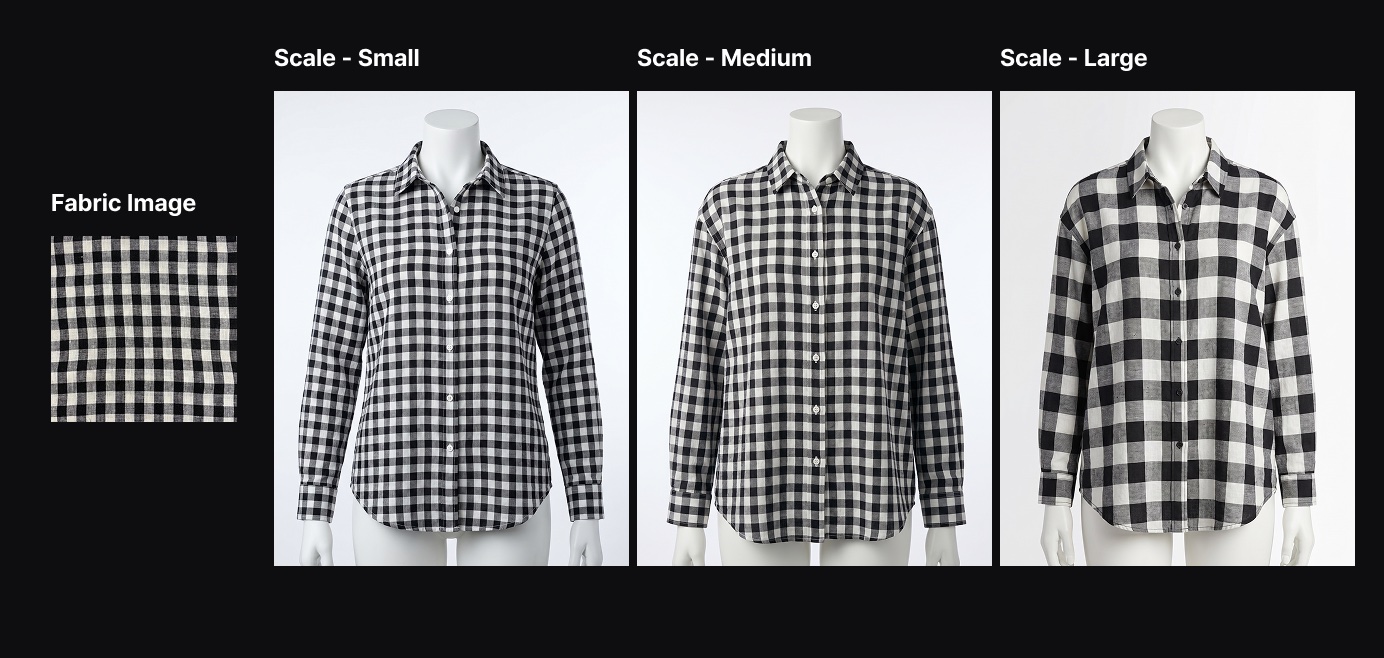
If material or thickness matters, fill in the fabric description too.
Examples 👇
- Heavyweight 100% cotton, cream ivory color, matte and structured surface
- Lightweight polyester, subtle sheen black
- Mid-weight wool blend, charcoal grey, subtle textured weave
STEP 2. Pick generation options 👕
In the middle area, choose what kind of garment to generate. Start by selecting a garment type.
- Top
- Bottom (pants)
- Bottom (skirt)
- Outerwear
- Custom upload
Pick a type, then choose from LaonGEN’s recommended designs.
If you have a specific garment shape in mind, choose Custom upload and upload your reference image.
Add a garment description if you’d like.
Example: Half-sleeve oversized shirt with a relaxed silhouette
When you’re done, hit Add Option. Your additions stack on the right.
💡 TIP! Want to generate multiple garment types from one fabric? Change the options and add them repeatedly. You can stack up to 10 at a time.
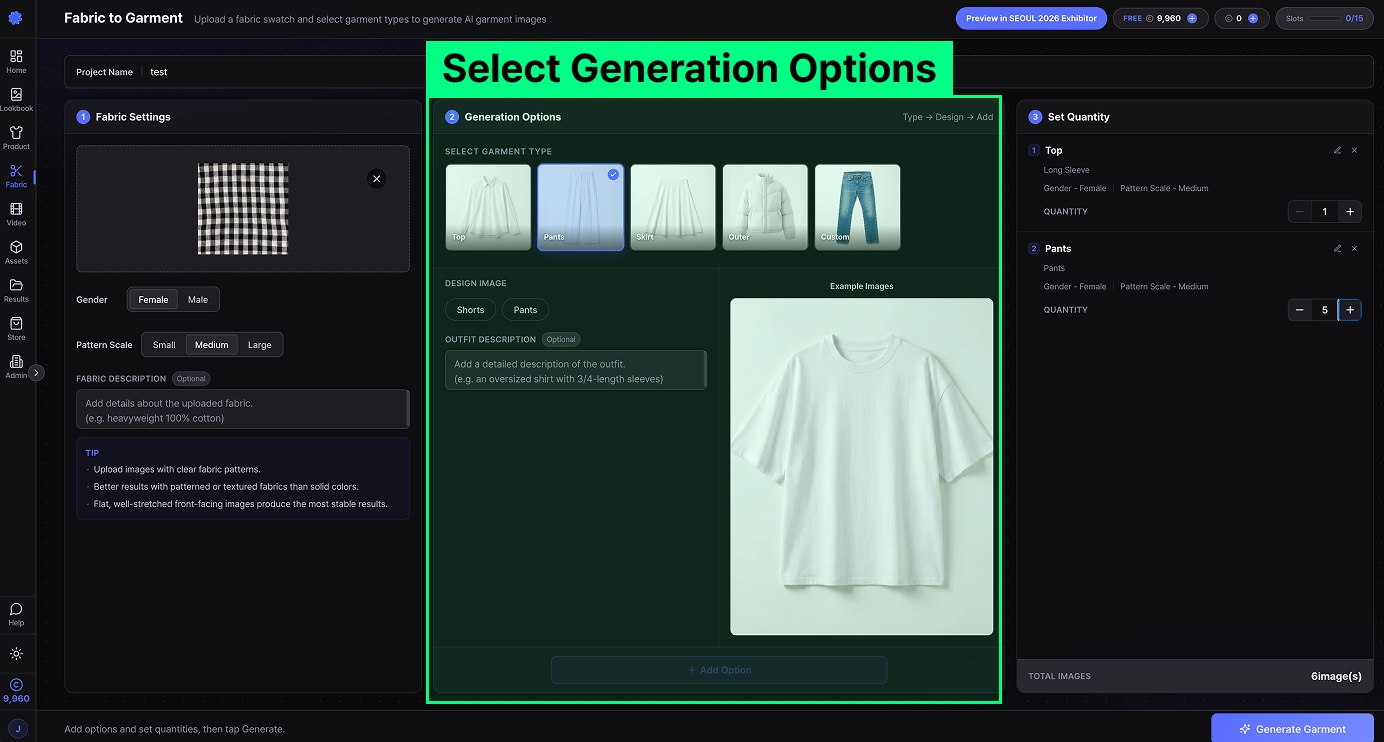
STEP 3. Set quantity and generate 👇
In the right area, set the quantity for each option.
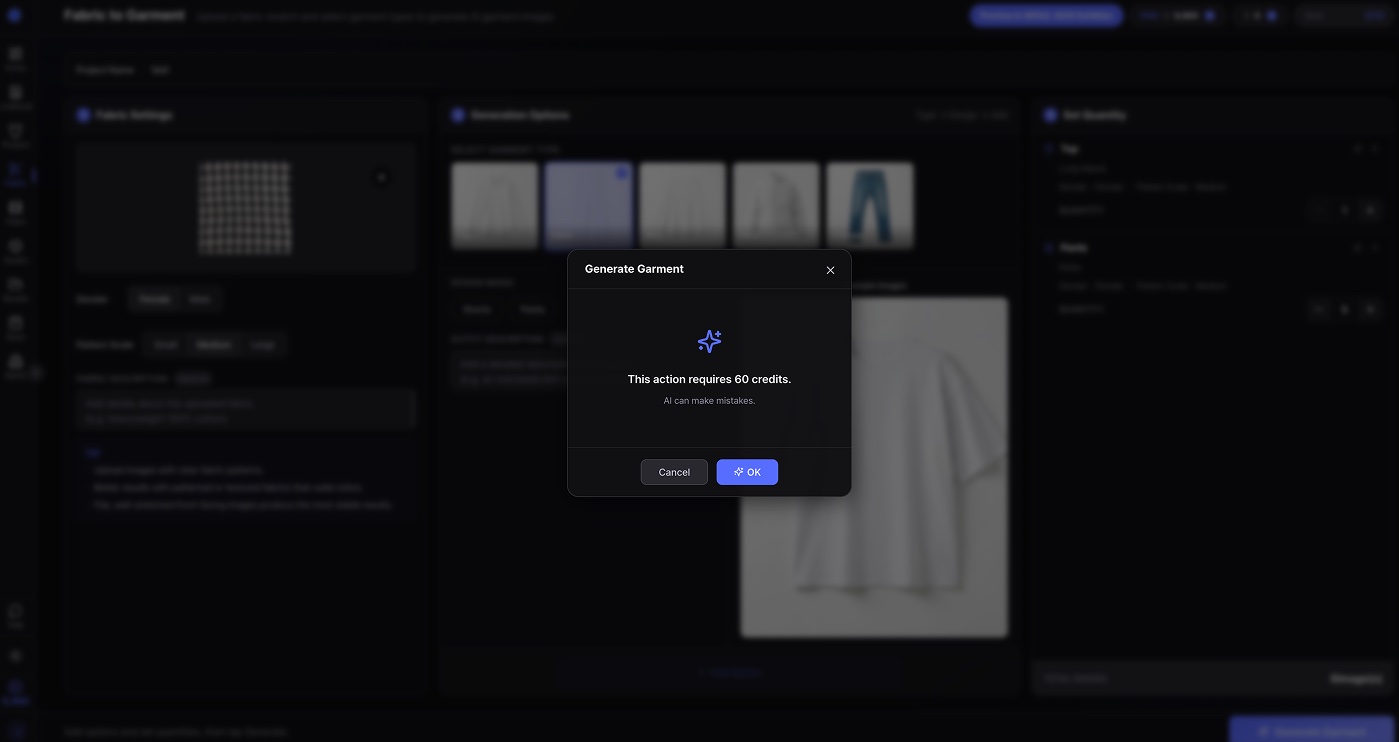
Once quantity’s set, click the Generate Garment button at the bottom!
Generation kicks off using your fabric image and chosen options as the inputs. Find finished results in the Results menu.
Don’t stop at the fabric shot 💡
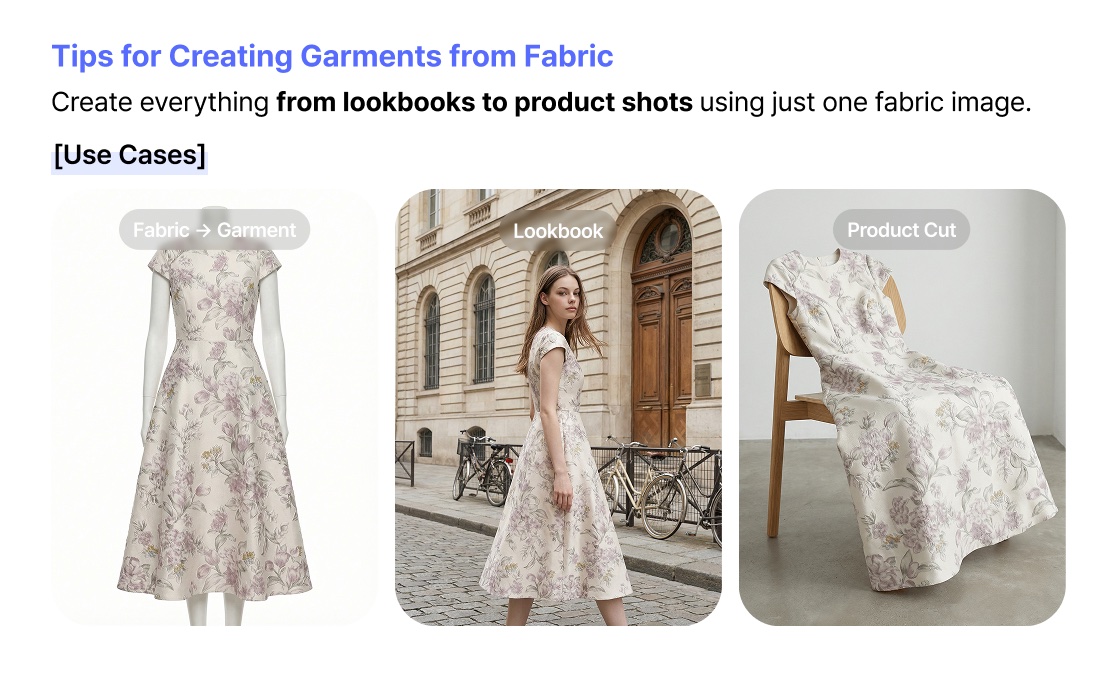
Use your generated fabric shot as the outfit image for Solo Lookbook. From a single fabric image you can chain straight into a model-worn lookbook.
Fabric → garment visualization → on-model lookbook. One fabric image, all the way to a finished lookbook.
Related guides 📚
One fabric image, one garment visualization, done. Ready to try Fabric Shots? 👇